Complete guide to installing your garden greenhouse: tips and essential steps
Do you dream of cultivating plants all year round and enjoying abundant harvests, even in winter? Installing a greenhouse is the ideal solution to create a true safe haven for your plants. But before you get started, several key steps must be taken into account to guarantee a solid and efficient installation. From selecting the perfect location to meticulously assembling the structure and preparing the ground, every detail counts. In this guide, we reveal all the essential steps, tricks, and advice so that your greenhouse installation project becomes absolute child's play. Ready to transform your vegetable garden into a horticultural paradise? Follow the guide!
Choosing the right location for your greenhouse
Before launching into the installation of your greenhouse, you will need to choose its location, which, as you can imagine, will have an impact on plant development. But this is not the only reason why you must determine the position of your greenhouse with care: positioning a greenhouse must also comply with legal boundary distances.
The ideal orientation to maximize sunlight
Optimal exposure to the sun's rays guarantees the success of your greenhouse crops.
- In northern regions, it is recommended to orient the longest sides facing south to take advantage of maximum sunlight throughout the entire day.
- Southern areas require a different approach: prefer an east-west orientation for the large walls. This configuration protects your plantations from summer overheating while maintaining sufficient luminosity.
Criteria for a suitable soil
The quality of the ground constitutes a determining factor for the longevity of your greenhouse. Stable, levelled soil guarantees a solid base, whereas loose ground requires prior reinforcement with an appropriate base frame.
In addition, soil composition plays a major role in crop growth. Monitor its acidity rate: it should remain between 6 and 7. Earth that is too acidic will require liming (a technique that consists of adding amendments or basic products to correct acidity) before installing the greenhouse.
The drainage capacity represents another important point. Clay soil that retains water risks destabilising the foundations; it will then be necessary to install a drainage system to facilitate the natural evacuation of rainwater.
Furthermore, adding a 10-centimetre deep gravel drainage layer will optimise the stability of the whole setup while preventing excessive moisture problems. This is beneficial for any type of ground.
Preparing the ground before installation
Before installing your greenhouse, proper soil preparation is essential to ensure its stability, drainage, and durability. This step takes place in three key phases: earthworks and levelling the soil, building foundations if necessary, and setting up efficient drainage.
Earthworks and levelling the soil
The first step consists of delimiting the work area. To do this, mark the contours of the zone using stakes and a taut string line. Next, you can proceed with excavation to eliminate weeds, any superficial roots, and any soil irregularities. After that, it will be the ideal time to flatten the ground. For an optimal result, use a mason's rule and a spirit level during levelling. Progressively compact the surface to avoid any future sagging.
To improve soil stability, add a layer of compacted gravel. On large surfaces, using a mini-excavator allows you to speed up the work and obtain a more homogeneous levelling. Finally, lay down an anti-regrowth geotextile fabric before installing the foundations: this will prevent weed growth while promoting good drainage.
Finish by checking the final flatness with a long board: no gap should exceed 2 centimetres over the entire length.
Building a concrete foundation
A concrete foundation is the most robust solution for stabilising a polycarbonate or glass greenhouse. It is particularly suited to large structures, as it offers excellent resistance to soil pressure and movement. You have several options:
- Concrete strip foundation: This technique consists of pouring concrete strips to form a frame under the walls of the greenhouse. Dig trenches about 10 cm deep and wide, then fill them with concrete. They will form a solid belt while preserving contact with the earth inside.
- Concrete block foundation: This economical and quick solution also provides a good baseline for the greenhouse. Arrange the blocks horizontally around the perimeter of the greenhouse, align them carefully, and bed them into the ground to ensure their stability.
- Concrete pier foundation: This approach consists of creating concrete pads under the main anchor points of the greenhouse. Dig holes at the post locations, fill them with concrete, then fix the greenhouse structure onto these anchoring points.
- Concrete slab foundation: This involves pouring a solid slab under the entire surface of the greenhouse. This method is ideal for unstable soils and creates a clean, level cultivation space.
The different drainage options
Good drainage is indispensable to avoid the accumulation of moisture under the greenhouse: stagnant water can weaken the structure and harm crops. Several solutions exist to manage water evacuation effectively:
- Installing gutters and water butts: In addition to protecting the greenhouse from water infiltration, this system allows you to collect rainwater for watering plants, providing an ecological and economical solution.
- Peripheral drainage: For clayey or particularly damp soils, adding drainage channels, gullies, or French drains filled with gravel prevents water from pooling around the foundations. A perforated agricultural drain pipe wrapped in geotextile can be installed to channel excess water to a collection point.
- Improving the soil inside the greenhouse: A layer of gravel or clay pebbles underneath the growing surface promotes root aeration and prevents water stagnation.
Steps for assembling glass and polycarbonate greenhouses
After choosing the location and preparing the ground, you are ready to install the greenhouse structure.
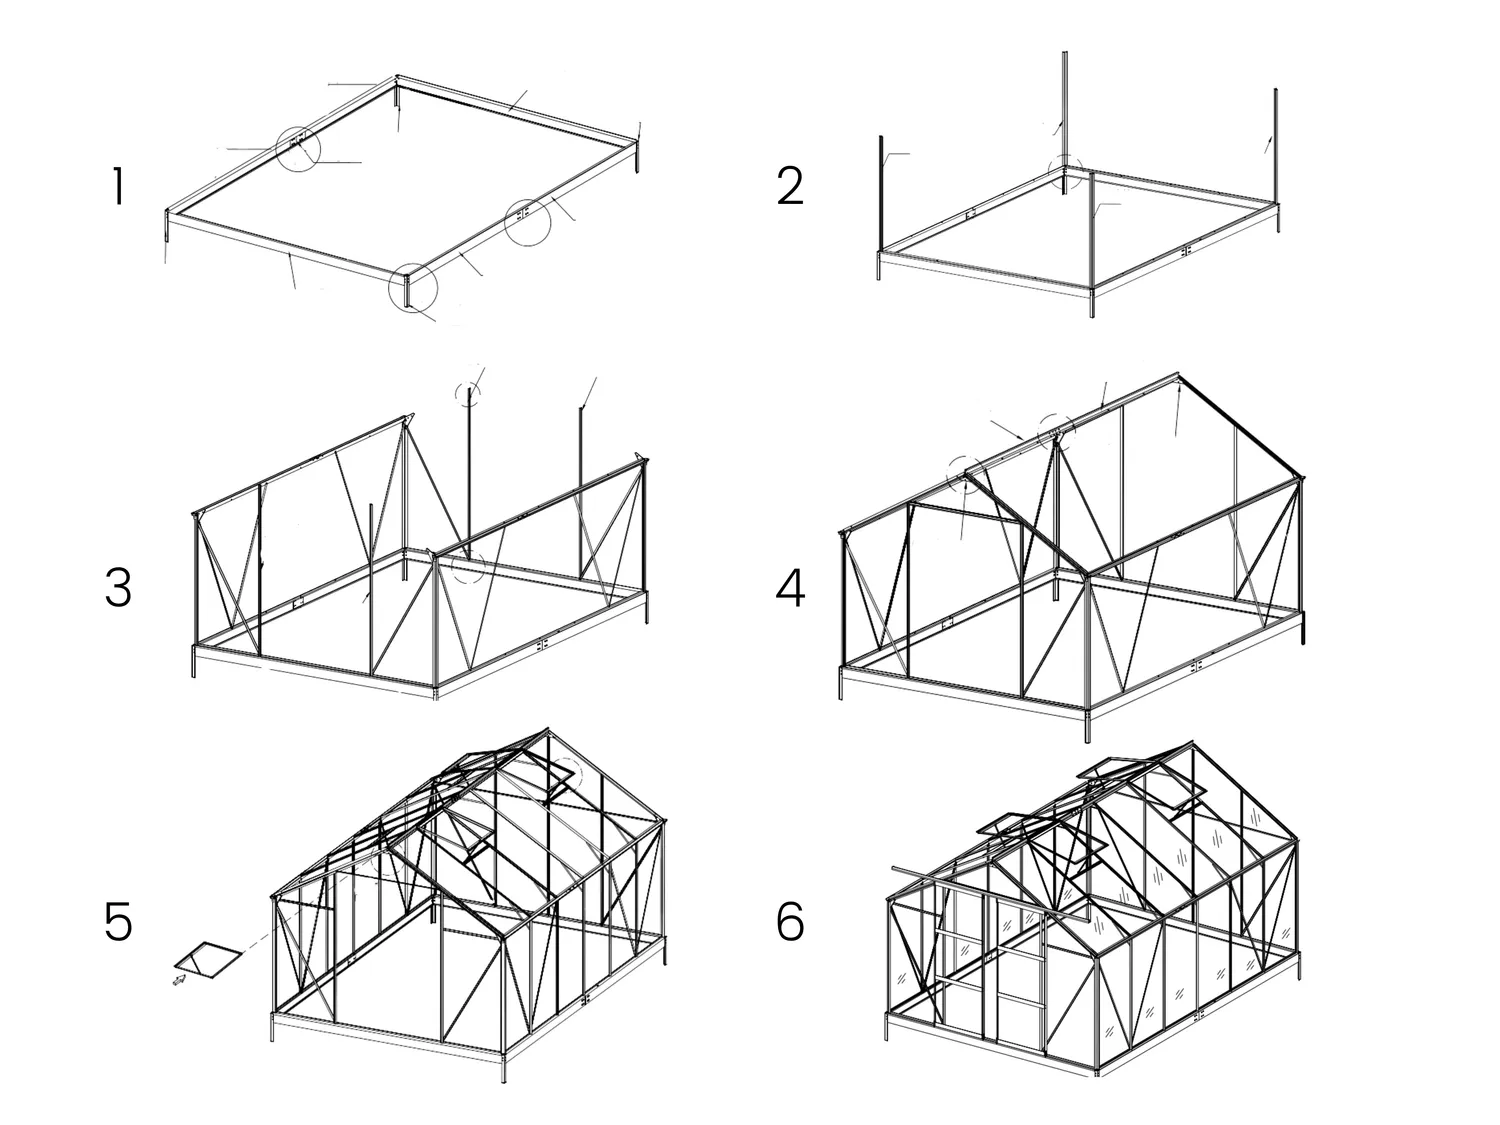
1) Assembling the metal frame
Before starting the assembly, carry out a rigorous sorting of the metal parts to check their conformity and facilitate the setup. Wear protective gloves and safety goggles to avoid injuries when handling the galvanised steel elements, which are often sharp.
- Step 1: Installing the base and vertical studs: Fix the base to the ground following the markers drawn beforehand. Position the vertical studs, ensuring their perfect verticality using a spirit level. A marking on the ground can help align each element with precision.
- Step 2: Setting up the horizontal crossmembers: Assemble the crossmembers, which reinforce the structure and guarantee its rigidity. Tighten the bolts progressively to allow for any necessary adjustments. Using a torque wrench ensures optimal tightening without risking damage to the threads.
- Step 3: Adding diagonal braces and checks: Fix the diagonal braces at strategic points, notably on the sides exposed to the wind, for better mechanical resistance of the greenhouse. Regularly check the alignment of the whole assembly after each step to avoid any distortion of the structure.
2) Fitting glass or polycarbonate panels
Installing the transparent panels is a delicate step that requires precision and attention to ensure optimal insulation and good performance over time. Whether you opt for tempered glass or polycarbonate, here are the best practices to follow:
- Step 1: Preparing and cleaning the panels: Before fitting, carefully clean each panel with a microfibre cloth to eliminate dust and fingerprints. Avoid aggressive products that could alter the transparency or damage the surface of the panels.
- Step 2: Installation conditions and precautions: Choose a windless day to prevent panels from catching the wind or getting damaged during handling. Work in pairs: having an assistant firmly hold the panels will facilitate installation and reduce the risk of breakage. Use professional suction cups to handle glass panels safely and without leaving marks.
- Step 3: Fixing the panels: methodology and water-tightness: Proceed from the bottom upwards to ensure proper alignment and a better distribution of weight. Apply a special greenhouse silicone sealant to the joints to guarantee a perfect seal against moisture and water infiltration. Fix the retaining clips at regular intervals for uniform pressure distribution and to prevent any panel deformation.
- Step 4: Verification and adjustments: After fitting each panel, check the alignment with care. A gap, even a minimal one, could compromise the water-tightness and solidity of the whole structure. Reinforce the fixings if necessary, particularly in areas exposed to strong winds.
3) Installing doors and windows
The openings of your greenhouse play a crucial role in ventilation, which is indispensable for the proper development of your plants. Their installation requires precision to ensure optimal air circulation and a good seal. Here are the steps to follow:
- Step 1: Fixing hinges and adjusting gudgeons: Fix the hinges to the main studs using screws adapted to your structure's material. This guarantees a solid and durable fix. Carefully adjust the gudgeons to obtain minimal play between the frame and the leaves. This ensures fluid movement and proper closing.
- Step 2: Checking fluidity and maintaining mechanisms: Test the movement of each opening by closing and opening it several times. This will allow you to check the proper functioning of the mechanisms. Apply a lubricant to the hinges and other moving parts to guarantee their longevity and prevent premature wear.
- Step 3: Weatherstripping and locking systems: Place weather seals around the entire perimeter of the openings to avoid drafts and water infiltration. Install a robust locking system, such as a spring latch or a cam handle, to ensure perfect airtightness, which is particularly useful during windy days.
- Step 4: Protecting panes and stops: Install window stops to limit the opening range of the windows, thereby preventing the glass from being damaged by overly strong winds or a sudden, brutal opening.
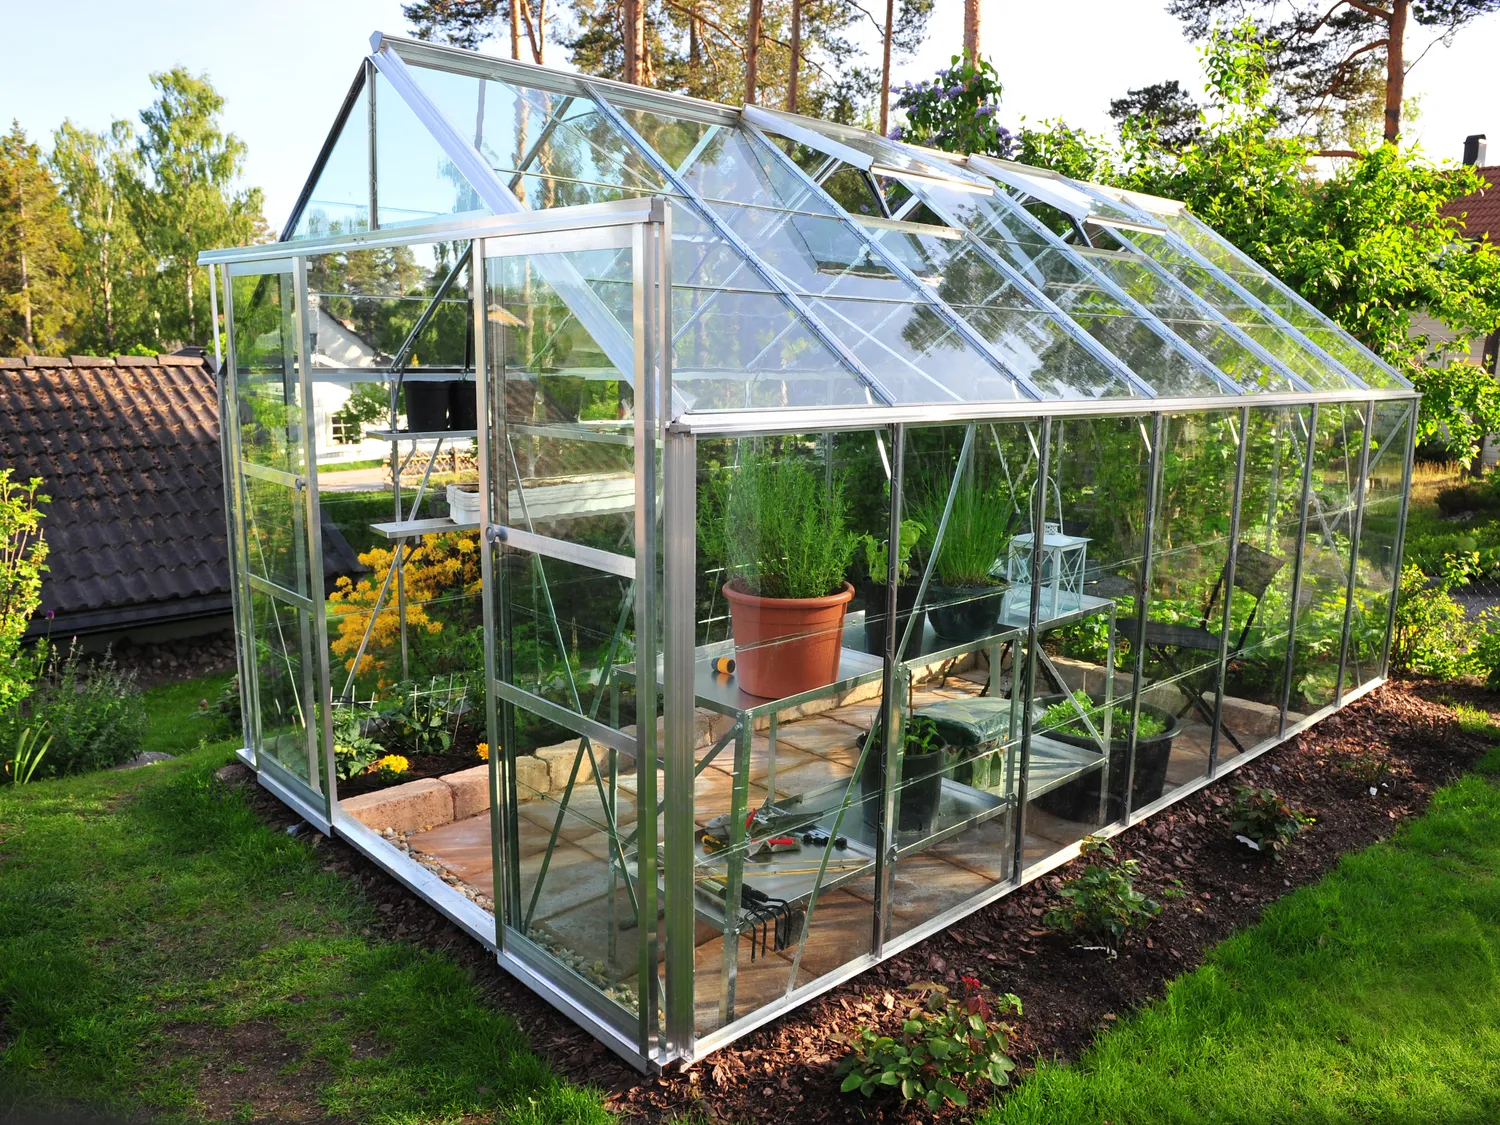
4) Fixing the roof
- Step 1: Preparing and sealing roof panels: Before assembly, apply a sealing strip between each panel to prevent water infiltration. Position the panels by overlapping them from the ridge (top) down towards the gutters to optimise rainwater drainage.
- Step 2: Progressive fixing and consolidating the structure: Tighten screws progressively with a torque wrench to guarantee uniform pressure across all surfaces, without risking weakening the materials. Install ridge reinforcements to stiffen the roof structure and prevent any deformation under the weight of snow or during strong gusts.
- Step 3: Reinforcing the seal: Add self-adhesive flashing tape along the junctions to reinforce protection against heavy rains and moisture. If your greenhouse is equipped with a roof vent, apply a flexible mastic sealant around the frame to prevent any water infiltration and ensure good insulation.
5) How to fix your greenhouse securely to the ground
A robust fixation is essential to guarantee the durability and resistance of your greenhouse against bad weather. Poorly executed anchoring can lead to structural deformations or even cause the greenhouse to be torn away in high winds. The choice of anchoring system will depend on several criteria, notably the nature of the soil, the size of the greenhouse, and local climatic conditions.
Here are the main solutions to anchor your greenhouse securely and avoid any risk of instability:
The different anchoring systems for ground fixation
Professional anchoring kits represent the most reliable solution to secure your greenhouse. These devices include earth screw anchors that drive deep into the ground, guaranteeing wind resistance up to 100 km/h.
For mini greenhouses, reinforced peg anchors represent a more economical and easy-to-install alternative. Their specific design guarantees a good grip in loose or semi-hard soils, preventing the greenhouse from shifting over time.
Fixing plates constitute an excellent option for medium-sized models. Equipped with retaining brackets and appropriate screws, they ensure remarkable stability on all types of ground. Reinforcement with expansion plugs effectively completes these devices on compact soils.
Fixing on a concrete slab
For optimal fixation on a concrete slab, the use of anchor bolts is recommended. These threaded rods are specially designed to ensure a robust attachment. They slide into holes previously drilled into the slab and through the greenhouse feet. Once positioned, simply tighten them with nuts to secure the whole structure. This system, simple to implement, guarantees a durable fixation and excellent resistance to outdoor stresses.
To avoid water infiltration under the greenhouse, it is recommended to apply a silicone bead between the base of the structure and the slab. This also protects the anchor points from moisture and prevents rust.
Finally, to further reinforce the fixation, a small tip: add metal angle brackets to the corners of the greenhouse. They allow for a better distribution of loads and prevent the structure from warping over time.
Solutions for loose soil
For sandy or poorly compacted terrain, helical screw stakes represent a wise choice. Their spiral shape ensures reinforced support, even in the most unstable soils. A simple rotating movement allows them to be driven progressively into the ground.
Fixing plates represent another efficient option, particularly adapted to heavy greenhouses installed on loose soil. These elements consist of short round or square tubes, ending in a pre-drilled plate. Once buried, the plates are held in place by the weight of the earth, thereby offering remarkable stability without requiring deep anchoring. This system is highly recommended for imposing structures!
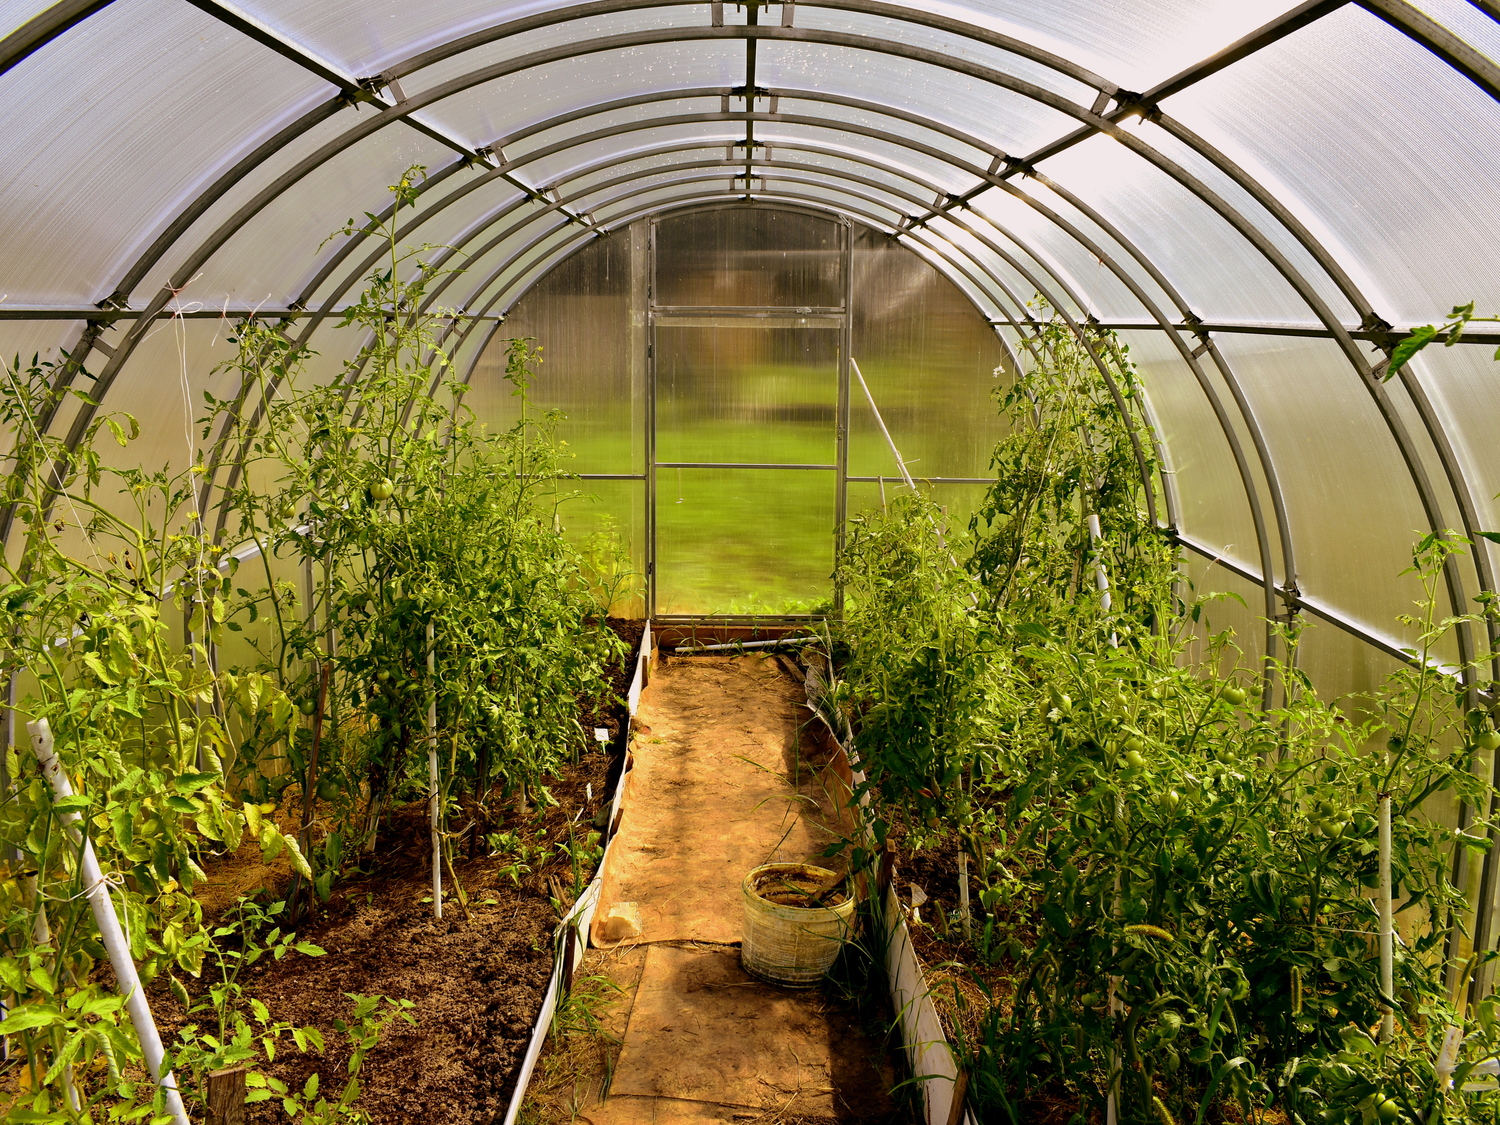
Step-by-step installation of a tunnel greenhouse
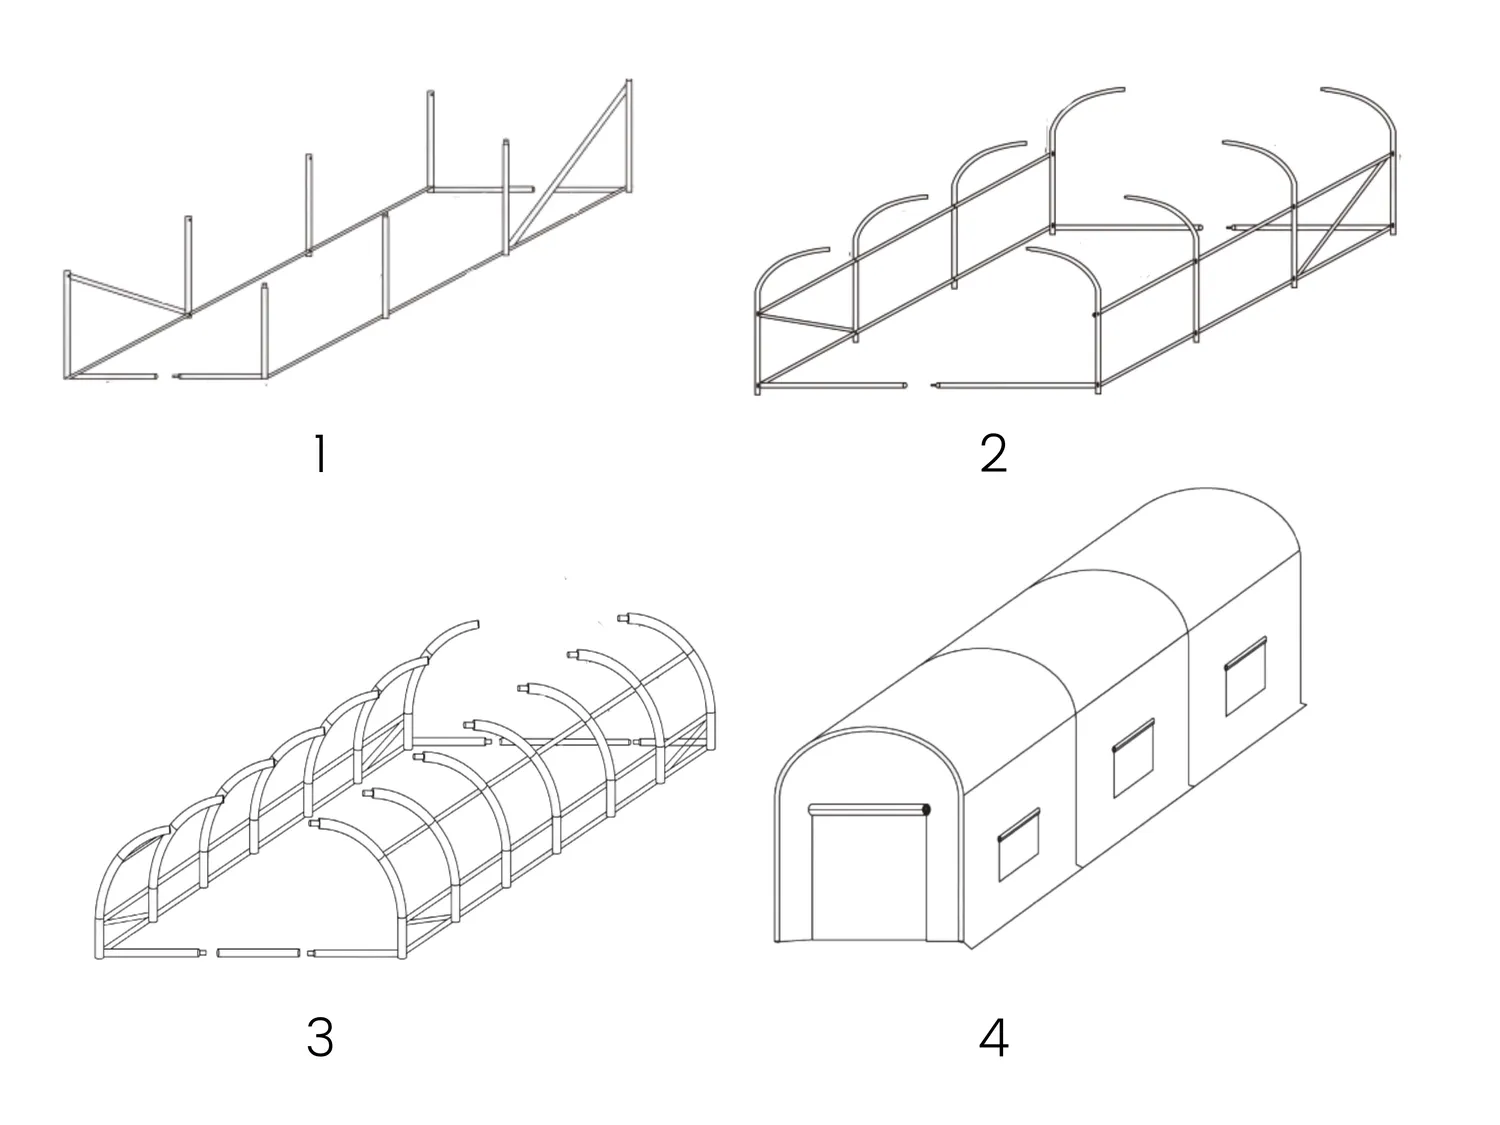
1) Assembling the hoops and structure
Successful assembly begins with preparing a clear workspace to lay out all the components of your tunnel greenhouse. Check the presence of each part by referring to the manual provided by Vente-unique.
For a successful installation, first position the tubes on the ground according to the assembly instructions. Then assemble each hoop individually, taking care to place the nuts facing inwards to protect the future cover sheet. A marking on the ground every 50 centimetres guarantees regular spacing between the hoops.
Fixing the spacers that link the hoops together is done progressively, starting from the base. This step considerably reinforces the rigidity of the whole structure and prevents any subsequent deformation.
2) Placing the cover sheet
Laying the tunnel greenhouse cover sheet requires optimal weather conditions: a moderate temperature between 10 and 25°C, with no wind. Start by gently unrolling your cover sheet onto a clean surface to avoid any punctures.
When burying your cover sheet, you can reinforce its hold using base plates, especially if your tunnel greenhouse is a large model. These are solid fasteners to bury: the weight of the earth distributed over the plate of the buried foot offers excellent wind resistance.
For perfect tension, position the cover sheet starting from the centre, then stretch it progressively towards the ends. The special fixing clips supplied with the sheet firmly hold the plastic film onto each hoop, while the edges are buried in the trench.
We advise you to dig a trench 20 to 30 cm deep around the perimeter of the structure to bury the sheet edges. This step guarantees a solid anchoring of the cover and reduces wind catch.
3) Tension and mooring systems
Adjustable tension straps constitute a key element to maintain the stability of your tunnel greenhouse. Fixed every 2 metres along the structure, they allow you to adjust the pressure according to climatic conditions.
Deltane wire represents an equally resistant solution. Its capacity to support up to 300 kg guarantees optimal support for the cover sheet. Spaced every 10 cm on the upper part of the greenhouse, the wires allow the sheet to be tensioned effectively and prevent the formation of water pockets.
To reinforce the whole setup, mooring hooks are positioned strategically at the junction points of the hoops. A system of ratchet tensioners completes the device, allowing precise adjustment of the tension at each anchor point.
Finally, installing storm bracing bars between the hoops brings additional rigidity to the structure, limiting the risks of deformation when facing the wind.
Essential finishes after constructing a greenhouse
Last step: finishes. Once the structure of your greenhouse is assembled, it is essential to apply finishing touches to guarantee it a long lifespan and proper functioning. Water-tightness, ventilation, and irrigation are key elements that influence not only the greenhouse's resistance to bad weather, but also the well-being of the plants grown inside. Here are the final steps not to be neglected to optimise the performance of your installation.
Weatherproofing joints and connections
A good seal is indispensable to protect your greenhouse from water infiltration and heat loss. To do this, start by applying a special greenhouse silicone mastic sealant on all junctions and connections, paying particular attention to sensitive areas like corners and fixing points.
In order to further reinforce protection against bad weather, apply reinforced adhesive tape along the aluminium profiles. These high-resistance tapes ensure efficient insulation while leaving the materials with the necessary flexibility to withstand temperature variations.
Finally, for optimal water-tightness, install EPDM seals on connection zones and openings. These synthetic rubber seals are designed to withstand extreme temperature gaps ranging from -40°C to +100°C, thereby ensuring maximum longevity for your greenhouse.
Installing the ventilation system
Good air circulation is essential to maintain a healthy climate inside the greenhouse and avoid the accumulation of moisture, which is conducive to disease development. For this, installing an automated ventilation system is an excellent solution.
Start by fixing thermosensitive cylinders onto the roof vents. These devices activate automatically when the temperature exceeds 25°C, thereby allowing natural aeration without manual intervention.
To improve air circulation, you can also install sliding side panels, mounted on pre-installed rails and smooth rollers. These openings allow you to adjust ventilation according to plant needs.
Remember to position your openings facing the prevailing winds to optimise air exchange. Finally, to prevent the intrusion of harmful insects without compromising good ventilation, add insect screens to each opening.
In the case of a tunnel greenhouse, the cover sheet can easily be opened to create a favourable aeration for crops.
Setting up the irrigation system
Watering is a key element for the successful development of crops under glass. For efficient and economical water management, installing a drip irrigation system is highly recommended.
This type of network allows water to be delivered directly to the roots via micro-perforated pipes, thereby avoiding any waste and maintaining constant soil moisture.
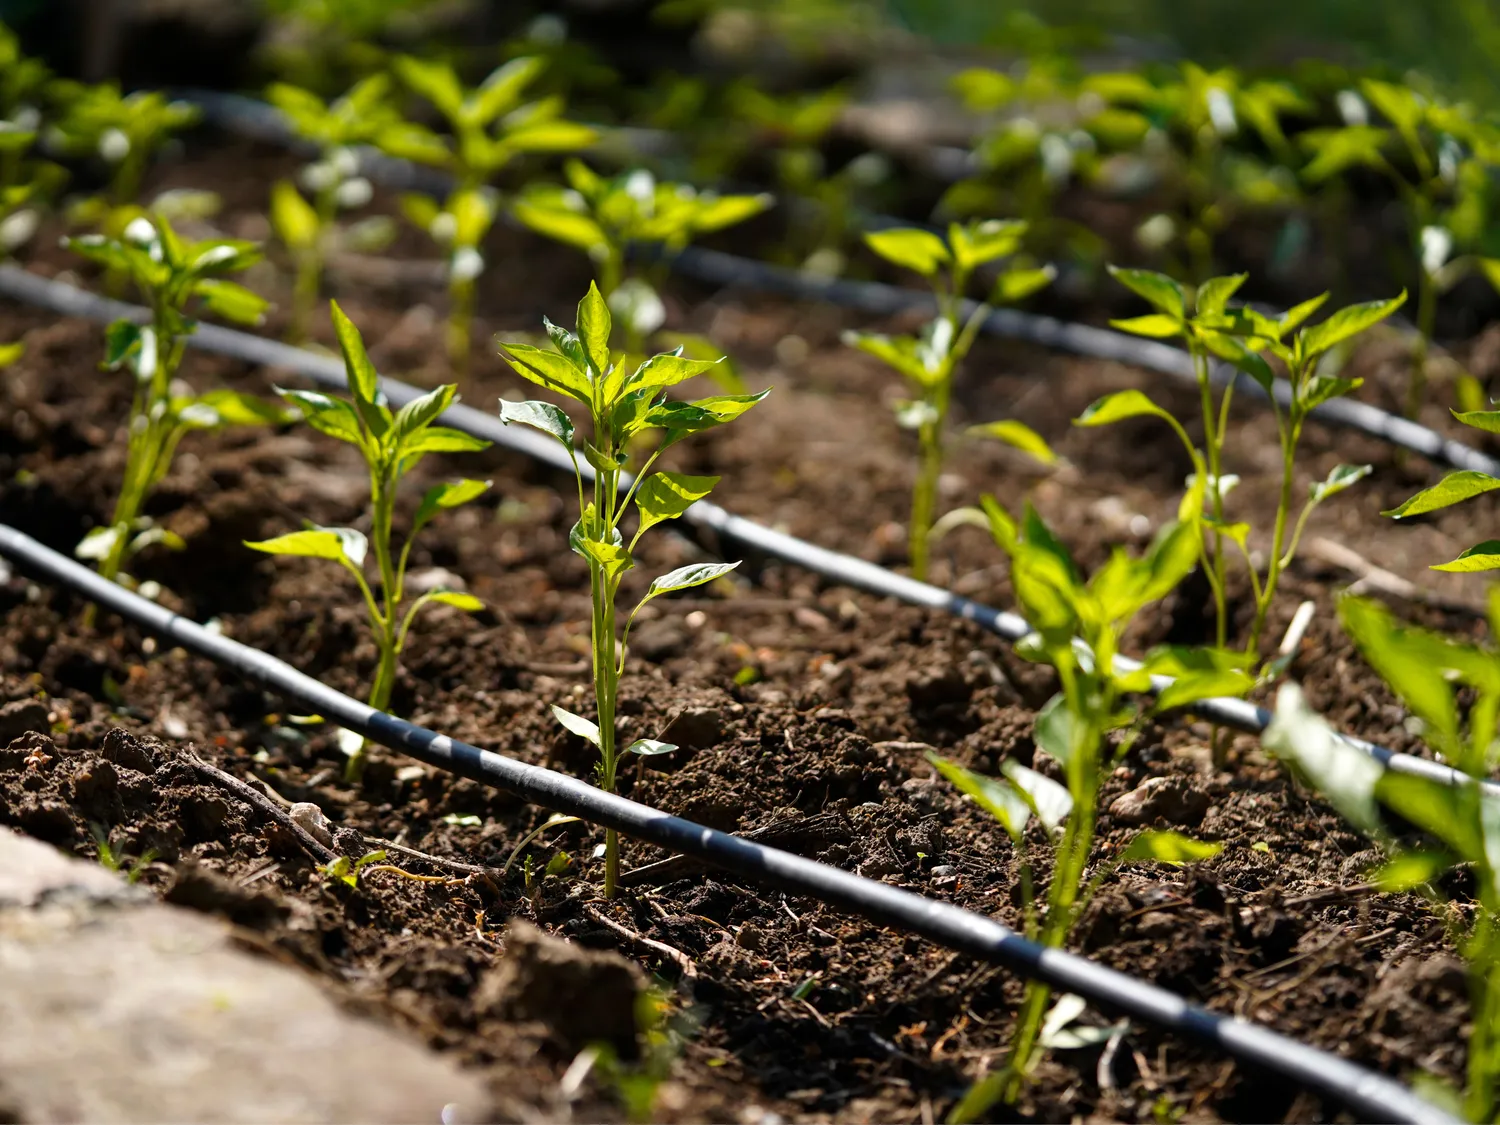
To guarantee a homogeneous distribution of water, opt for a kit equipped with a pressure regulator and anti-sediment filters. This will prevent flow variations and stop pipes from clogging up.
Final advice: for even more precise watering management, arrange the irrigation lines parallel to each other, spaced 50 centimetres apart, and add an automatic timer. The latter will adjust irrigation cycles based on the specific needs of your plants, ensuring optimal watering without any effort.
Installing a garden greenhouse is an excellent way to extend your crops throughout the entire year and offer your plants an optimal environment. Following these essential steps, from choosing the location to installing the structure and finishes, will guarantee you a solid, well-anchored greenhouse that is perfectly adapted to your plants' needs. Whether you opt for a traditional greenhouse or a tunnel model with a cover sheet, meticulous preparation and well-thought-out adjustments will ensure its durability and the flourishing of your crops. All that's left is for you to enjoy your new gardening space and harvest the fruits (and vegetables) of your labour!